If you’re a property owner or manager considering a new roof, understanding what happens during a professional roof replacement is crucial. Whether you own a small business, oversee developments, or simply want to protect your investment, working with an experienced roofing contractor Bloomfield Hills residents trust can make all the difference. A roof replacement is a significant project that impacts your property’s safety, appearance, and value. Knowing what to expect helps you plan, avoid surprises, and ensure the process goes smoothly. This guide walks you through every phase, from the first inspection to the final cleanup, so you can approach your roof replacement with confidence and clarity.
Initial Consultation and Roof Assessment
The journey to a new roof begins with an initial consultation and a thorough assessment. When you contact a reputable roofing company, they’ll schedule an on-site visit to evaluate your property. During this meeting, the contractor will inspect the current roof, noting its age, materials, and any visible damage. They’ll also ask about your goals, such as improving energy efficiency, updating the appearance, or resolving persistent leaks.
Expect the contractor to check for issues like missing shingles, soft spots, and signs of water intrusion. They’ll look at the attic (if accessible) to assess ventilation and check for hidden problems. This step is vital for creating an accurate estimate and ensuring that the proposed solution addresses your unique needs. The contractor may also discuss local building codes and any permits required for the project.
At this stage, you can ask questions about the process, timeline, and available roofing materials. A trustworthy company will explain their recommendations clearly and provide a detailed written estimate. For those in the area, working with Bloomfield Construction ensures you receive expert advice tailored to local conditions and regulations.
Selecting the Right Materials for Your Property
Choosing the appropriate roofing material is a key decision that affects your property’s durability, energy efficiency, and curb appeal. Contractors will present you with options such as asphalt shingles, metal roofing, slate, or synthetic materials, each with its own pros and cons. Factors like your building’s architecture, budget, and long-term maintenance preferences play a role in the selection process.
In regions with variable weather, it’s important to select materials that can withstand temperature swings, heavy snow, and rain. Some materials offer better insulation, while others are prized for their longevity or aesthetic qualities. Your contractor should explain the lifespan, warranty, and maintenance needs of each option, helping you make an informed choice.
If you’re unsure how to match roofing materials to local weather patterns, check out How to Choose the Right Roofing Material for Bloomfield Hills Weather for a deep dive into climate-specific recommendations. This resource can help you weigh your options and feel confident about your investment.
Understanding the Project Timeline and Preparation
Once materials are selected and contracts are signed, your contractor will outline a project timeline. This schedule includes delivery of materials, removal of the old roof, installation, and final inspection. The timeline can vary based on the roof’s size, complexity, and weather conditions, but most replacements take several days to a week.
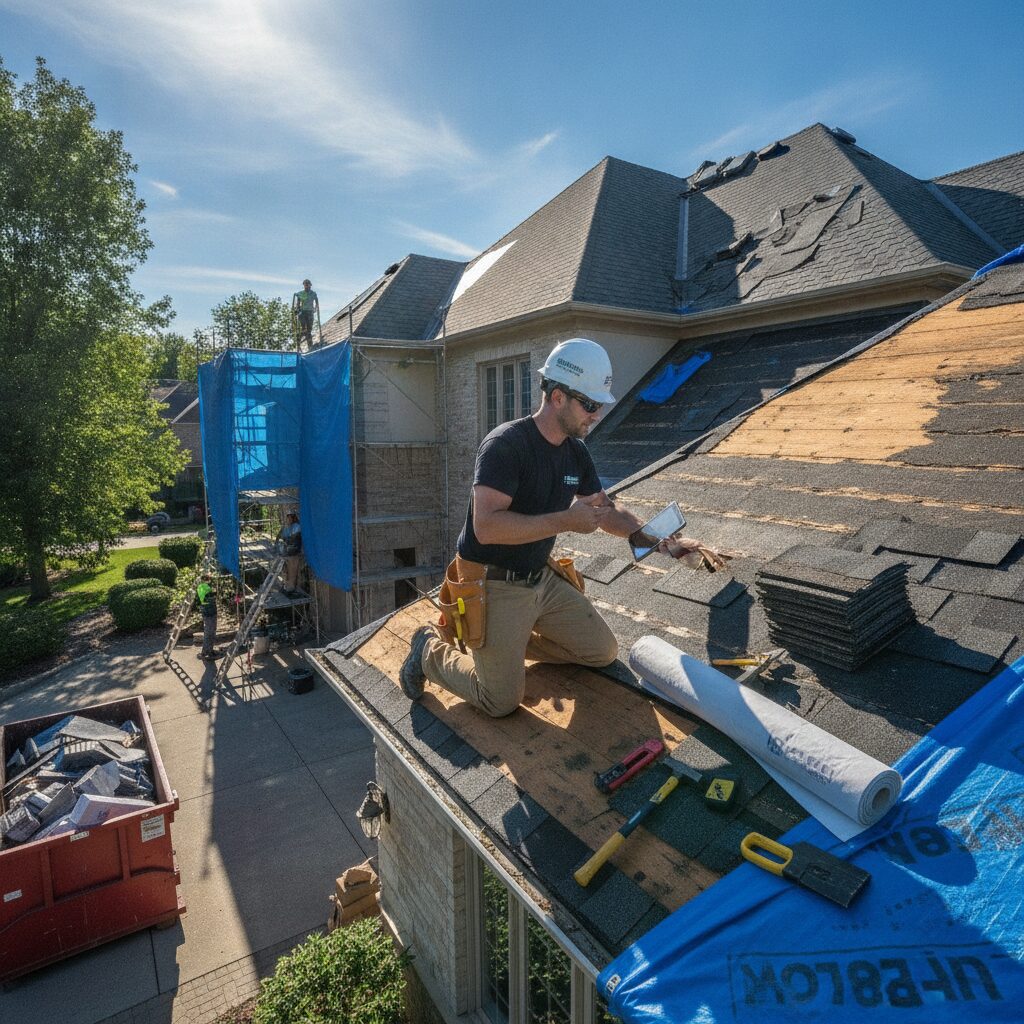
Preparation is crucial for a smooth project. The contractor will advise you on steps to take before work begins, such as moving vehicles, securing outdoor furniture, and protecting landscaping. They may also set up safety barriers and dumpsters for debris. Communication is key, expect regular updates on progress and any changes due to weather or unforeseen issues.
During preparation, safety is a top priority. Crews will wear protective gear, and the work area will be clearly marked. For property owners, understanding the risks and safety protocols is essential. If your property has experienced fire or water damage in the past, it’s important to be aware of potential hidden hazards. For more information, see Understanding the Hidden Hazards After Fire Damage in Bloomfield Hills for insights on how previous incidents can impact your roof replacement.
Removing the Old Roofing System
The first major step in the replacement process is removing the existing roofing system. This involves stripping away old shingles, underlayment, and sometimes even the decking if it’s damaged. Crews use specialized tools to carefully remove materials, minimizing disruption to the structure below. This phase can be noisy and messy, but a professional team will keep the worksite as tidy as possible.
During removal, contractors inspect the underlying decking for rot, mold, or water damage. Any compromised sections are replaced to ensure the new roof has a solid foundation. This is also the time to check for proper ventilation and address any issues that could affect the roof’s lifespan. Proper disposal of old materials is handled by the contractor, who will use dumpsters or haul-away services to keep your property clean.
Property owners should expect some temporary inconvenience, such as restricted access to parts of the building and increased noise. However, clear communication from your contractor helps minimize surprises and keeps the project on track.
Inspecting and Repairing the Roof Deck
Once the old materials are removed, the roof deck is thoroughly inspected. This wooden platform supports the entire roofing system, so its condition is critical. Contractors look for signs of water damage, rot, or structural weakness. If any sections are compromised, they are replaced or reinforced to ensure a stable base for the new roof.
This inspection is also an opportunity to upgrade insulation or address ventilation issues. Proper airflow in the attic helps prevent moisture buildup, which can lead to mold or ice dams in colder months. Some contractors use moisture meters or thermal imaging to detect hidden problems that aren’t visible to the naked eye.
Repairing the deck may add time to the project, but it’s a crucial investment in the roof’s longevity. Skipping this step can lead to premature failure of the new roofing system, so reputable contractors always prioritize a thorough inspection before moving forward.
Installing Underlayment and Flashing
With a solid deck in place, the next step is installing underlayment and flashing. The underlayment is a protective barrier that sits between the decking and the roofing material. It helps prevent water infiltration from wind-driven rain or ice dams, providing an extra layer of defense for your property.
Flashing is installed around roof penetrations such as chimneys, vents, and skylights. Made from metal or synthetic materials, flashing directs water away from vulnerable areas and prevents leaks. Proper installation is essential for long-term performance, as poorly installed flashing is a common source of roof leaks.
Some roofing systems also incorporate ice and water shields in areas prone to freezing. Your contractor will explain which products are best suited for your property and climate. These layers work together to protect your investment and ensure your new roof stands up to the elements.
Roofing Material Installation Process
The installation of the new roofing material is the centerpiece of the project. Crews work systematically, starting at the bottom edge and moving upward, overlapping materials to create a watertight seal. The exact process varies depending on the material chosen, shingles are nailed in place, while metal panels are fastened with screws and special clips.
Attention to detail is critical during installation. Contractors must align materials precisely, maintain consistent spacing, and ensure all fasteners are secure. Ridge vents, hip caps, and other finishing touches are added last, completing the system and enhancing both performance and appearance.
Throughout this phase, quality control checks are performed to catch any issues early. Experienced crews take pride in their workmanship, ensuring your new roof not only looks great but also delivers reliable protection for years to come.
Quality Control and Final Inspection
After installation, a comprehensive inspection ensures the new roof meets all quality standards. The contractor will check for proper alignment, secure fasteners, and correct installation of flashing and vents. They’ll also look for any cosmetic issues, such as uneven shingle lines or exposed nails.
This inspection may include a walk-through with the property owner, allowing you to ask questions and address any concerns. Some contractors use checklists to document the inspection process, ensuring nothing is overlooked. If any issues are found, they are addressed promptly before the project is considered complete.
Passing the final inspection is essential for warranty coverage and long-term performance. A reputable roofing contractor will stand behind their work and provide documentation for your records, including warranty information and maintenance recommendations.
Cleanup and Site Restoration
A professional roof replacement doesn’t end when the last shingle is installed. Cleanup and site restoration are important steps that protect your property and leave it looking its best. Crews will remove all debris, sweep the area with magnets to collect stray nails, and restore landscaping disturbed during the project.
Expect the contractor to haul away old materials, packaging, and any temporary barriers or equipment. They may also clean gutters and check for damage to siding or driveways. A final walk-through ensures the property is returned to its original condition, or better.
This attention to detail is a hallmark of quality service. It shows respect for your property and demonstrates the contractor’s commitment to customer satisfaction. Don’t hesitate to point out any concerns during the final inspection, as reputable companies are eager to address them promptly.
Warranty Coverage and Maintenance Tips
With your new roof in place, understanding warranty coverage and maintenance requirements is essential. Most roofing systems come with manufacturer warranties covering materials and workmanship guarantees from the contractor. Review your warranty documents carefully to understand what’s included and any actions that could void coverage.
Regular maintenance helps maximize your roof’s lifespan. This includes clearing debris from gutters, checking for damaged shingles after storms, and scheduling periodic inspections. Promptly addressing minor issues can prevent costly repairs down the road.
Ask your contractor for a maintenance checklist tailored to your roofing material and local climate. Some companies offer maintenance packages or annual inspections, providing peace of mind and protecting your investment for years to come.
Comparing Roofing Material Options
Selecting the right roofing material is a significant decision. The table below compares popular options based on durability, cost, and maintenance needs to help you make an informed choice for your property.
| Material | Durability | Estimated Lifespan | Maintenance Needs | Relative Cost |
|---|---|---|---|---|
| Asphalt Shingles | Good | 15-30 years | Low | $$ |
| Metal Roofing | Excellent | 40-70 years | Low to Moderate | $$$ |
| Slate | Outstanding | 75-100+ years | Low | $$$$$ |
| Synthetic (Composite) | Very Good | 30-50 years | Low | $$$ |
Discuss these options with your contractor to find the best fit for your needs and budget. Remember, the right material balances performance, aesthetics, and long-term value.
What to Expect After Your Roof Replacement
Once your new roof is installed, you’ll notice immediate benefits. Improved insulation can lead to lower energy bills, while enhanced curb appeal may increase property value. The peace of mind that comes from knowing your building is protected from the elements is invaluable.
You may also receive documentation for your warranty and maintenance guidelines. Keep these records handy for future reference. It’s a good idea to schedule periodic inspections, especially after severe weather, to ensure your investment continues to perform as expected.
If you have questions or notice any issues, reach out to your contractor promptly. Reputable companies are committed to customer satisfaction and will address concerns quickly. Enjoy the security and beauty of your new roof, knowing you’ve taken a proactive step to protect your property for years to come.
Key Takeaways
A professional roof replacement is a major investment, but with the right preparation and a trusted contractor, the process can be smooth and rewarding. From the initial inspection to the final cleanup, each step is designed to ensure your property remains protected, beautiful, and valuable. Remember to communicate openly with your contractor, ask questions, and stay involved throughout the project. By understanding what to expect, you can make informed decisions and enjoy the long-term benefits of a high-quality roofing system tailored to your needs.