Insulation is the quiet hero of a building. It sits inside walls and above ceilings, holding heat where it belongs and keeping cold air out, and most owners never think about it until something goes wrong. When moisture gets in, that hero turns into a liability fast. Wet insulation loses its ability to resist heat flow, grows heavy enough to pull away from the framing, and becomes a perfect home for mold. If you are researching water damage restoration Bloomfield Hills property owners can trust, understanding what moisture does to insulation is one of the most useful places to start, because the damage is often hidden long before a stain appears on a ceiling or a wall.
Michigan climate makes this topic especially relevant. Freezing winters, heavy snow loads, spring thaws, and humid summers all push moisture into places it should never reach. A small roof leak in January can soak an attic blanket for weeks before anyone notices. A slow pipe weep inside a wall cavity can saturate batts for months. In this guide we will walk through how different insulation types react to water, what warning signs to watch for, how professionals decide between drying and replacing, and what you can do to protect your investment. Whether you manage a small commercial space, oversee a development, or simply own your home, the goal is the same: catch the problem early, fix it properly, and avoid paying for the same repair twice.
Why Insulation Is So Vulnerable to Moisture
Most insulation works by trapping tiny pockets of still air. Fiberglass, cellulose, mineral wool, and foam all rely on that trapped air to slow the movement of heat. Water destroys this design in two ways. First, it fills the air pockets, and since water conducts heat far better than air, the material stops insulating almost immediately. Second, it adds weight, which causes compression and slumping, leaving gaps that never fully recover even after drying.
The result is a wall or attic that looks intact from the outside but performs poorly. Heating bills climb, rooms feel drafty, and cold spots appear along exterior walls. Because insulation is buried behind drywall or under decking, the performance loss can continue for a long time unnoticed. That hidden quality is why a lot of water damage is discovered late, often only after musty odors or discolored ceilings finally force the issue.
How Different Insulation Types React to Getting Wet
Not every insulation behaves the same way, and the restoration approach depends heavily on what is inside your walls. Fiberglass batts are inorganic, so the glass itself does not rot, but the paper or foil facing can stay damp, trap moisture against framing, and feed mold. Once saturated, batts often clump and rarely regain their original loft, which means drying them in place usually leaves a permanent performance gap.
Cellulose is made from recycled paper treated with fire retardants. It absorbs water readily, holds it for a long time, and can settle into dense, soggy mats that smell sour. Mineral wool tolerates moisture better and often dries more successfully, though heavy soaking still calls for evaluation. Closed-cell spray foam is the most water resistant, since it does not absorb water, but it can hide moisture trapped against the wood behind it. Open-cell foam behaves more like a sponge and usually needs removal after a significant wetting event.
Attic Insulation and the Roof Leak Connection
Attics are where insulation most often meets water. A failed shingle, cracked flashing, or clogged gutter can send a steady trickle onto the attic floor, where it soaks through the blanket of insulation and into the ceiling drywall below. In winter, warm indoor air escaping into a poorly sealed attic can also condense on cold roof decking, creating moisture without any visible leak at all. Winter buildup at the eaves is a common culprit, and you can read more about How Ice Dams Can Affect Bloomfield Hills Roof Systems to see how meltwater backs up under shingles and drips into the space below.
Wet attic insulation is heavy, and that weight can strain ceiling drywall until it bows or collapses. It also traps humidity against rafters and decking, encouraging rot over time. If you notice stained ceilings, a damp smell upstairs, or icicles forming unevenly along the roofline, the attic deserves a close look before the damage travels further down into living areas.
What Happens Inside Wall Cavities
Wall insulation faces a different set of threats. Supply lines, drain lines, window leaks, and failed exterior sealant can all deliver moisture into a cavity that has almost no airflow. Water wicks along studs and drywall paper, soaking insulation well beyond the original leak point. Because the cavity is enclosed, drying is slow, and mold can begin establishing itself within a couple of days when conditions stay warm and damp.
A homeowner may only see a small brown patch or a bubbled paint spot, yet the wet zone behind it can stretch several feet in every direction. This is where moisture meters and thermal imaging earn their keep, since they reveal the true boundaries of the problem. A trusted team such as Bloomfield Construction approaches these situations by mapping the wet area first, then deciding how much material must be opened up rather than guessing from surface stains alone.
Warning Signs You Should Never Ignore
Because insulation damage hides so well, learning the early signals can save a lot of money. Look for these common indicators around your property:
- A persistent musty or earthy smell, especially after rain or snowmelt
- Ceiling stains, sagging drywall, or paint that bubbles and peels
- Sudden spikes in heating or cooling costs without a change in usage
- Cold or warm patches on walls that do not match the rest of the room
- Visible mold specks around vents, corners, or attic access hatches
- Pests drawn to damp, softened material
Any one of these may have a simple explanation, but two or three together almost always point to a moisture problem. If your roof is involved, it helps to have the source evaluated promptly, and you can click here to see how roofing repair can stop the leak that feeds the damage.
The Mold Risk Hidden Behind Wet Insulation
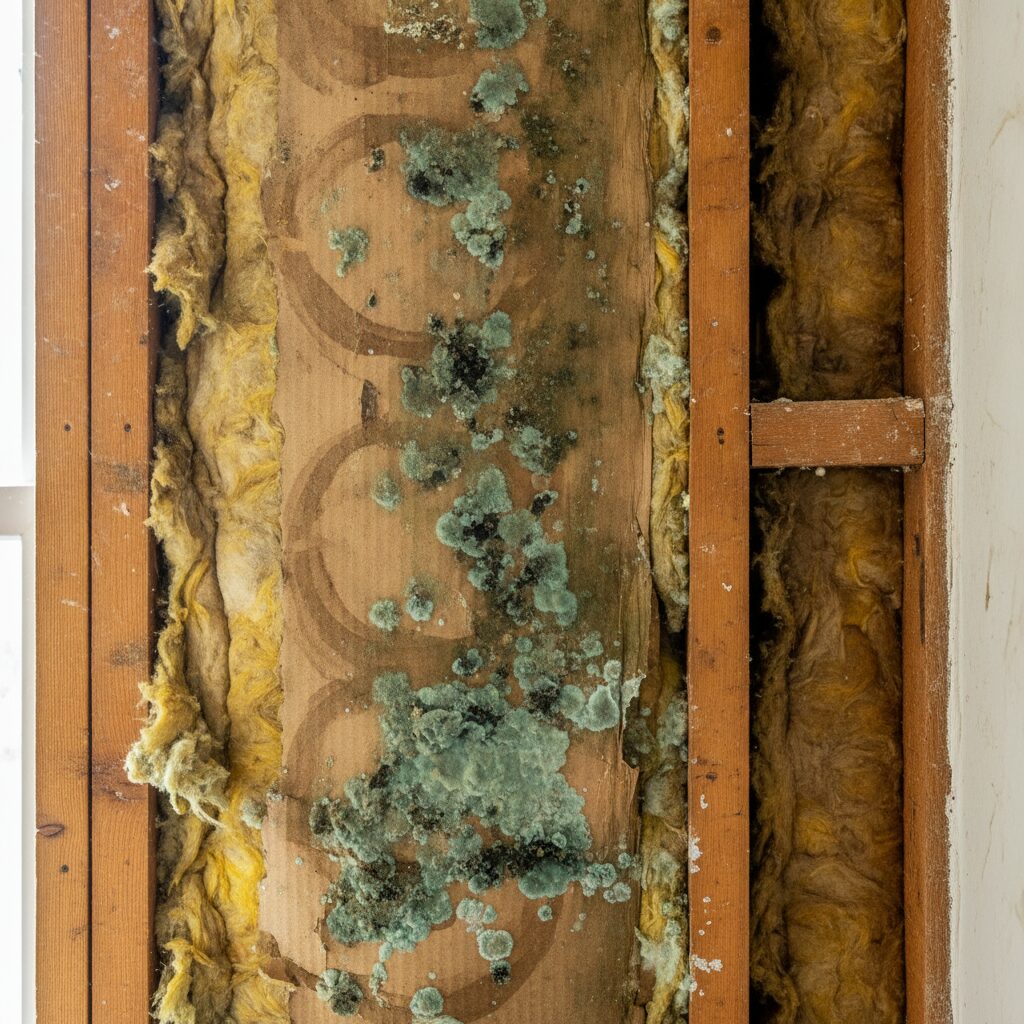
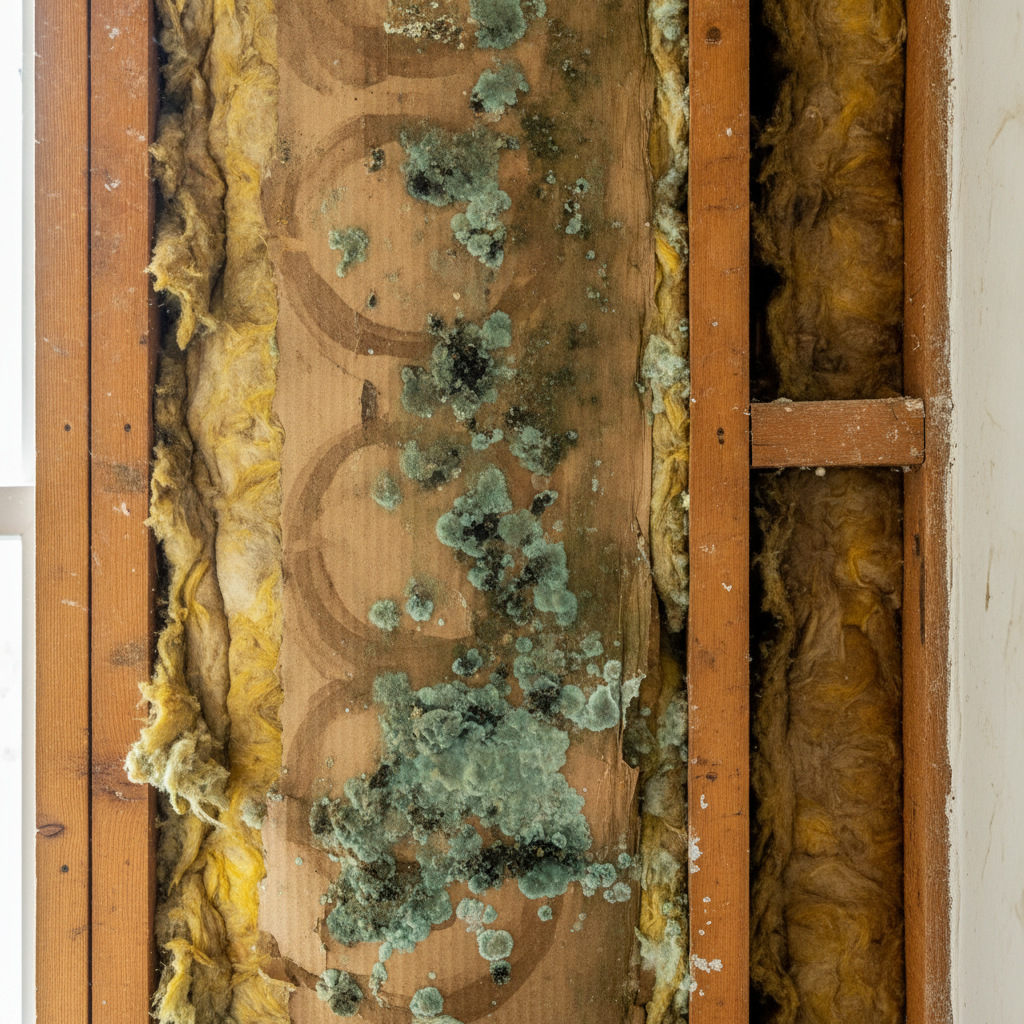
Mold needs moisture, a food source, and time. Wet insulation supplies the first, drywall paper and wood framing supply the second, and a sealed cavity supplies the third. Once colonies take hold, spores can travel through gaps around outlets and ductwork into the living space, affecting air quality and aggravating allergies or asthma in sensitive occupants.
The challenge is that mold behind a wall is invisible until it grows large enough to stain the surface. By then, remediation is more involved and more expensive. Professionals typically recommend removing saturated insulation instead of trying to dry it in place when the material has been wet for more than a short window. Removing it exposes the framing so it can be dried, cleaned, and inspected, which gives you a clean starting point for new material rather than sealing a hidden problem behind fresh drywall.
Dry It or Replace It: How Pros Decide
One of the most common questions property owners ask is whether wet insulation can simply be dried and reused. The honest answer is that it depends on the material, the source of the water, and how long the material stayed wet. Clean water from a fresh supply line leak caught quickly gives you the best chance of saving some materials. Water from a roof leak that has carried dust, debris, and organic matter is a different story, as is any water that sat for several days.
Technicians weigh a few factors: the insulation type, moisture readings through the cavity, whether odors or visible growth are present, and whether the material has slumped or lost its loft. As a general rule of thumb, fiberglass and cellulose that were thoroughly soaked are replaced, mineral wool and closed-cell foam are more likely candidates for drying, and anything touched by contaminated water is removed regardless of type.
Comparing Insulation Types After Water Exposure
The table below summarizes how common materials generally respond to a significant wetting event. Individual results vary with the length of exposure and water source, so treat this as a general guide rather than a promise.
| Insulation Type | Water Absorption | Typical Outcome |
|---|---|---|
| Fiberglass batts | Moderate | Often replaced when soaked |
| Cellulose | High | Usually removed |
| Mineral wool | Low | Can often be dried |
| Closed-cell spray foam | Very low | Usually salvageable, check behind it |
| Open-cell spray foam | High | Often removed |
The Restoration Process Step by Step
A thorough restoration follows a logical sequence. It starts with stopping the source, because drying a wall that is still leaking accomplishes nothing. Next comes assessment, where moisture meters, infrared cameras, and sometimes small inspection openings reveal how far the water traveled. Affected drywall and insulation are then carefully removed, and any contaminated material is bagged and disposed of properly.
After removal, the exposed framing and sheathing are dried with air movers and dehumidifiers until readings return to normal levels. Surfaces are cleaned and, when needed, treated to discourage microbial growth. Only then does rebuilding begin, with new insulation installed to the right depth and density, followed by vapor control, drywall, and finishes. Skipping the verification step, where readings are confirmed before closing walls, is one of the most common reasons moisture problems return a few months later.
Smart Prevention for Walls and Attics
Prevention is far cheaper than restoration, and most of it is simple maintenance. Keep gutters clear so water drains away from the roofline and foundation. Inspect shingles and flashing after major storms. Seal gaps where warm indoor air can leak into the attic, since that air is the source of much winter condensation. Make sure bathroom and kitchen fans vent outdoors rather than into the attic.
Inside the home, watch for slow plumbing leaks by checking under sinks, behind toilets, and around water heaters. Keep indoor humidity in a moderate range, especially during humid summers and long heating seasons. For businesses and multi-unit properties, a scheduled walkthrough each spring and fall helps catch small problems before they spread. Sometimes a related event like a fire leaves behind its own moisture issues from firefighting water, and reading about Smoke-Damaged Electronics: What Bloomfield Hills Property Owners Should Know can help you understand how different types of damage overlap in a single loss.
Working With Insurance and Documentation
Insurance claims for moisture losses tend to go more smoothly when you document everything early. Take dated photos and video of visible damage, keep receipts for emergency repairs, and save any moisture readings or inspection reports you receive. Note when you first noticed the problem and what you did next, since carriers often look at whether a homeowner acted promptly to limit further damage.
Understand that coverage varies by policy and by cause. Sudden events are often treated differently than long-term seepage or maintenance neglect, so read your policy and ask your agent questions before work begins. A restoration company that provides clear scope descriptions, material lists, and drying logs makes it much easier for an adjuster to see exactly what was necessary and why. Detailed paperwork protects you, and it also gives you a record that supports the property value if you ever sell.
Choosing Local Help in Bloomfield Hills
When you search for water damage restoration Bloomfield Hills residents can rely on, look for a team that understands local building styles, from older estate homes with layered insulation upgrades to newer construction with tight envelopes. Ask whether technicians use moisture mapping tools, how they document drying progress, and whether they can coordinate drywall, insulation, and finish work under one roof. Fewer handoffs usually means fewer gaps where problems slip through.
It also helps to choose a provider who is honest about what can be saved and what cannot. A company that recommends replacing soaked insulation and explains the reasoning is generally more trustworthy than one that promises to dry everything and skip demolition. Get written estimates, check licensing and insurance, and read recent reviews from neighbors who faced similar problems before you commit.
Final Thoughts
Insulation rarely gets attention until it fails, yet it plays a major role in comfort, energy costs, and the long-term health of your structure. Water turns that protective layer into a source of trouble by destroying its thermal performance, adding weight, and feeding mold in places you cannot see. The most important lessons are straightforward. Stop the water source first, assess the true extent of the wet area with proper tools, remove materials that cannot be dried safely, and verify dryness before rebuilding.
Pay attention to the early signs, including musty smells, stained ceilings, rising energy bills, and uneven temperatures, because small clues usually appear long before major failure. Keep your roof, gutters, and plumbing in good shape, and document any loss thoroughly so insurance conversations stay simple. Most importantly, do not rush to cover a problem with fresh paint or new drywall before confirming what is happening behind the surface. Taking a little extra time up front protects your property, your budget, and the people who live or work inside it. With the right knowledge and a reliable local partner, even a serious moisture event can be handled cleanly, leaving your walls and attic performing the way they should for many seasons to come.