When a storm rips your roof, act fast: cover holes with contractor-grade tarps and board up skylights to stop more damage, and divert water away from the interior. Photograph everything from multiple angles with timestamps and back images up for claims. Find vetted local roofers, check licenses and insurance, and get several written estimates. Arrange emergency tarping anchored against wind and move valuables to higher ground. Keep going for step-by-step guidance on permanent repairs and insurance handling.
Key Takeaways
- Inspect damage safely from ground, photograph all affected areas, and date-stamp images for insurance.
- Call three qualified local roofers, verify licenses and insurance, and get written emergency estimates.
- Install contractor-grade tarps and board up holes, securing edges with flashing tape to shed water.
- Move valuables off affected areas, place buckets under leaks, and cover furniture with waterproof sheeting.
- Document temporary repairs, keep receipts, and schedule permanent replacement with clear timeline and warranty.
Secure Temporary Protection to Prevent Further Damage
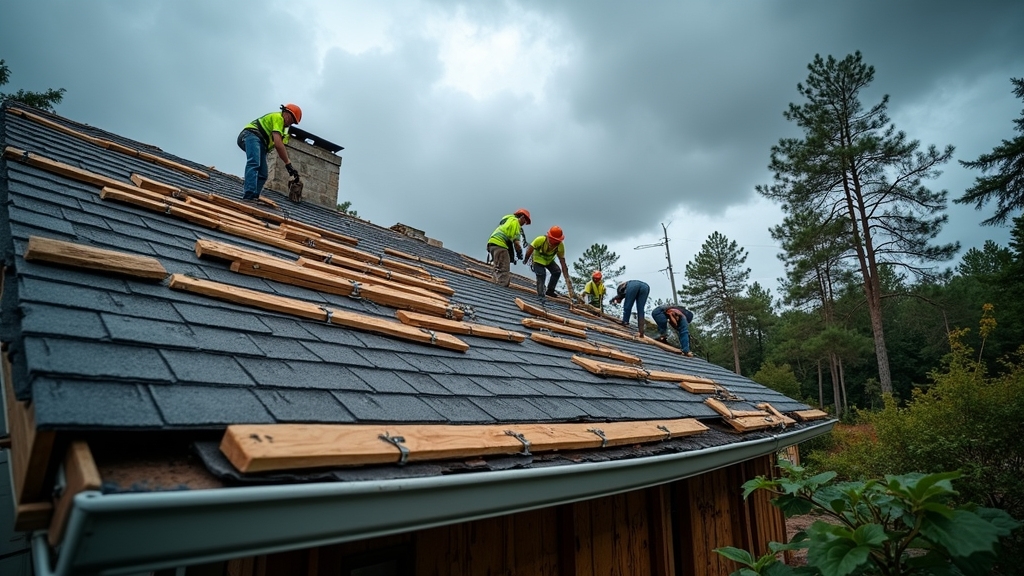
Before any repair work starts, secure temporary protection to stop more damage from happening—cover holes with tarps, board up broken skylights, and divert water away from the interior.
You’ll want to act quickly but safely: prioritize stabilizing exposed areas, wear proper fall protection, and avoid roofing work during active storms.
Use reliable temporary roofing solutions like contractor-grade tarps, weighted fasteners, and breathable underlay to keep moisture out without trapping condensation.
Use contractor-grade tarps, weighted fasteners, and breathable underlay to shed water while preventing trapped condensation.
Position tarps so water sheds off the roof rather than pooling, and seal tarp edges with flashing tape if you can.
For vents or skylights, cut rigid covers to size and screw them in place with neoprene-washer fasteners.
Keep an interior bucket and temporary catch system under active leaks to limit ceiling damage.
These storm preparedness strategies buy you time to arrange a professional inspection and full replacement, reducing secondary damage and giving crews a safer environment to perform permanent repairs.
Document All Roof Damage for Insurance Claims
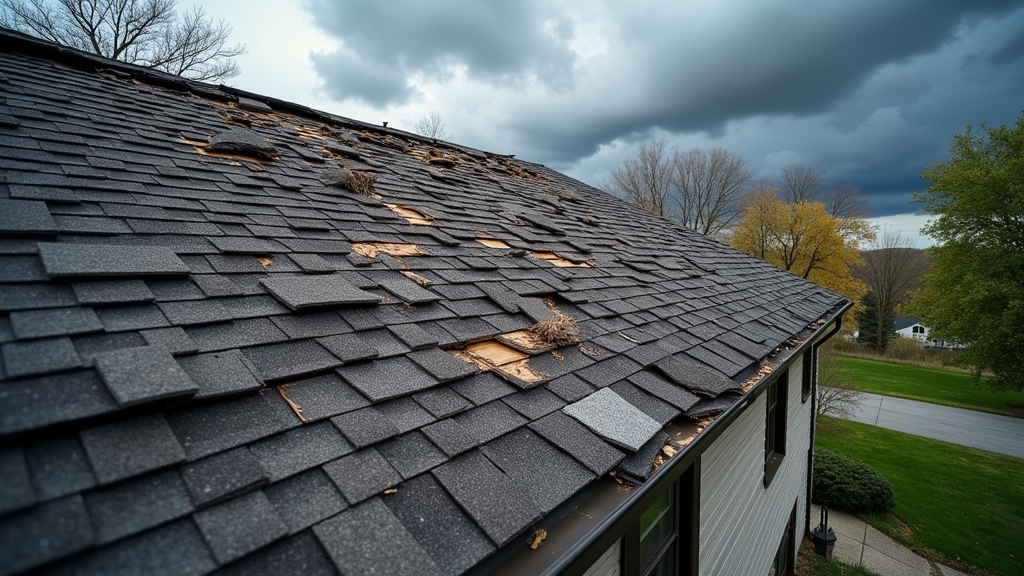
Documentation is essential when you file an insurance claim, so start by photographing and recording every visible area of damage from multiple angles and distances. You should work methodically: walk the perimeter, note missing shingles, dents, punctures, and gutter damage, and capture wide shots plus close-ups that show scale.
Date-stamp or log each image and back them up to cloud storage so nothing’s lost. Include interior photos of leaks, stains, and fallen debris to link roof damage to home impact.
Keep a written list of observations—locations, measurements, and the time you saw them—and save receipts for temporary repairs or emergency supplies. When you contact your insurer, provide organized photo evidence and your written timeline to speed claim review.
Don’t guess about causes; describe what you see and when. Clear, consistent insurance documentation reduces disputes and helps you get timely approval for permanent repairs.
Locate and Vet Qualified Local Roofing Contractors
Once you’ve documented the damage for your insurer, start finding qualified local roofing contractors who can assess repairs and provide estimates.
Check online contractor reviews to gauge reliability and recurring issues, but dig deeper: ask for references, recent project photos, and contact info for former clients.
Check reviews, then dig deeper — request references, recent project photos, and contact information for former clients.
Verify licensing requirements in your state or municipality — don’t rely on paper alone; confirm with issuing agencies that licenses are current and unrestricted.
Ask about insurance: confirm they carry workers’ comp and liability and request certificates.
Get multiple written estimates that break down materials, labor, timelines, cleanup, and warranty terms.
Watch for red flags like high-pressure sales, vague scopes, or demands for large upfront payments.
Prefer contractors who provide a clear contract, local address, and dedicated project manager.
When you’ve compared estimates, warranties, and reviews, pick the contractor who balances solid references, verified licensing requirements, transparent pricing, and timely availability.
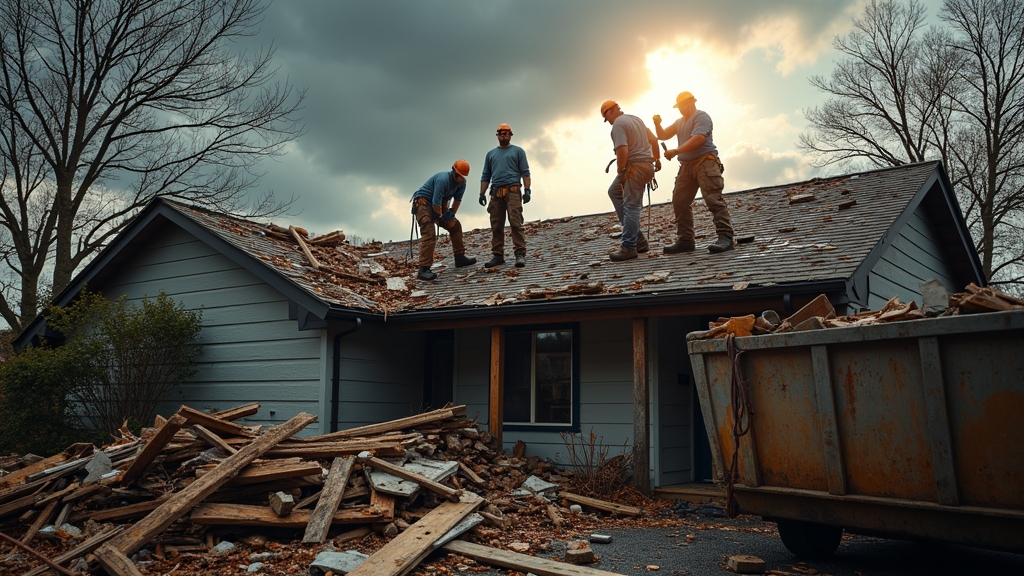
Arrange Emergency Temporary Repairs and Tarping
After you’ve chosen a contractor, arrange emergency temporary repairs or tarping right away to prevent further water intrusion and structural damage.
You’ll want the team to assess vulnerable areas, secure loose shingles, and prioritize tarp installation over exposed sections. Confirm they’ll use durable materials and properly anchor tarps to avoid wind uplift.
Keep a simple kit of emergency supplies—tarps, ropes, nails, gloves, and a ladder—so you can assist safely if needed.
- Ask the contractor to pinpoint leak points and outline temporary fixes.
- Verify tarp installation methods and materials; insist on watertight overlaps and secure fastening.
- Keep clear communication about timing, costs, and safety measures before work begins.
- Store emergency supplies accessibly and document temporary repairs with photos for insurance.
These steps help limit immediate damage and buy time until a full replacement can be scheduled.
Prevent Water Intrusion and Protect Interior Belongings
Because water can seep through even small roof breaches, act quickly to keep your interior dry and salvage belongings. First, move sensitive items—documents, electronics, linens—to a safe, elevated area. Cover furniture and floors with plastic sheeting or waterproof materials to limit damage and speed cleanup. Use buckets and containers to catch active leaks and place towels around spills to prevent spread.
Next, create temporary barriers: seal seams of tarps with contractor-grade tape and install drip edges where possible to direct water away from walls. Check attic spaces and use fans and dehumidifiers to reduce moisture and mold risk; document damage with photos for insurance.
If you’ll leave items in place, wrap them in heavy-duty plastic and label boxes so restorers can prioritize what’s salvageable. Finally, coordinate with your contractor or restoration pro about permanent repairs and any specific interior protections they recommend to reduce future vulnerability.
Frequently Asked Questions
Will My Homeowner’s Insurance Cover a Full Roof Replacement After a Storm?
You might get a full roof replacement if storm damage’s covered; check your insurance policy and deductible. You’ll document damage, file a claim, meet adjuster requirements, and follow the insurer’s claim process for approval and payment.
How Long After the Storm Should I Expect Contractor Availability?
You’ll often wait 2–8 weeks for contractor availability; high contractor demand after storms creates scheduling delays, so you should contact several contractors early, get estimates, and be flexible with timing to secure an earlier slot.
Can I Legally Replace the Roof Myself Without a Contractor?
You can, but check DIY roofing rules first: local building permits and Legal regulations often require licensed contractors for certain repairs, inspections, or insurance claims, so confirm codes and insurance requirements before you start to avoid fines or denied coverage.
Will a Temporary Repair Affect My Insurance Claim Settlement?
Yes — temporary repairs won’t usually hurt your claim process if you document damage, keep receipts, and avoid permanent fixes; insurers expect emergency temporary repairs to prevent further loss, but confirm requirements with your adjuster first.
Do Storm-Related Roof Repairs Require a Building Permit?
Yes — you’ll often need a permit for storm-related roof repairs; local building codes dictate the permit process, and you should contact your municipality, document work, and guarantee contractors follow codes to avoid fines or claim issues.
Final Thoughts
When a storm tears through your roof, the steps you take in the first hours make all the difference. Securing temporary protection with tarps and boards, carefully documenting damage for your insurer, and moving valuables out of harm’s way all help limit the loss until a full replacement can be done. From there, working with vetted local contractors and getting clear written estimates puts you in control of the emergency roof replacement process instead of reacting in panic.
If you need expert help right away, Bloomfield Construction and Restoration offers 24/7 emergency roofing support for urgent roof leaks and storm damage, along with quality roof repair and replacement services for Bloomfield Hills residents. Our team can install professional tarping, assess whether you need repair or full replacement, and guide you through insurance restoration requirements and documentation. If you’re comparing companies, resources like our guide to reliable roofing contractors in Bloomfield Hills can help you choose confidently.
When a storm hits, don’t wait for the next rainfall to make things worse. Contact Bloomfield Construction and Restoration today to schedule an emergency inspection, get honest recommendations, and move from temporary patching to a permanent, warrantied roof replacement that protects your home for years to come.