After a storm, prioritize safety: stay off a damaged roof unless you’re trained and anchored, and check for live wires or sagging areas from the ground. Contain interior leaks with buckets and tarps, move valuables, and document damage with time-stamped photos. Remove debris and clear gutters, then temporarily tarp exposed areas—secure edges to framing and watch for ponding. Replace or nail down loose shingles, inspect flashing and vent boots, and call your insurer; keep going to get step-by-step tips.
Key Takeaways
- Prioritize safety: check for hazards, use proper footwear, helmet, harness, and have a spotter before going on the roof.
- Contain leaks immediately with buckets, towels, and waterproof sheeting while tracing water back to the entry point.
- Secure a breathable reinforced tarp over damaged areas, fastening to solid framing with corrosion-resistant fasteners and washers.
- Inspect and temporarily seal flashing, vents, and chimney gaps with roofing sealant or replacement boots to stop water intrusion.
- Document all damage with time-stamped photos and receipts, then contact your insurer before signing contractor waivers.
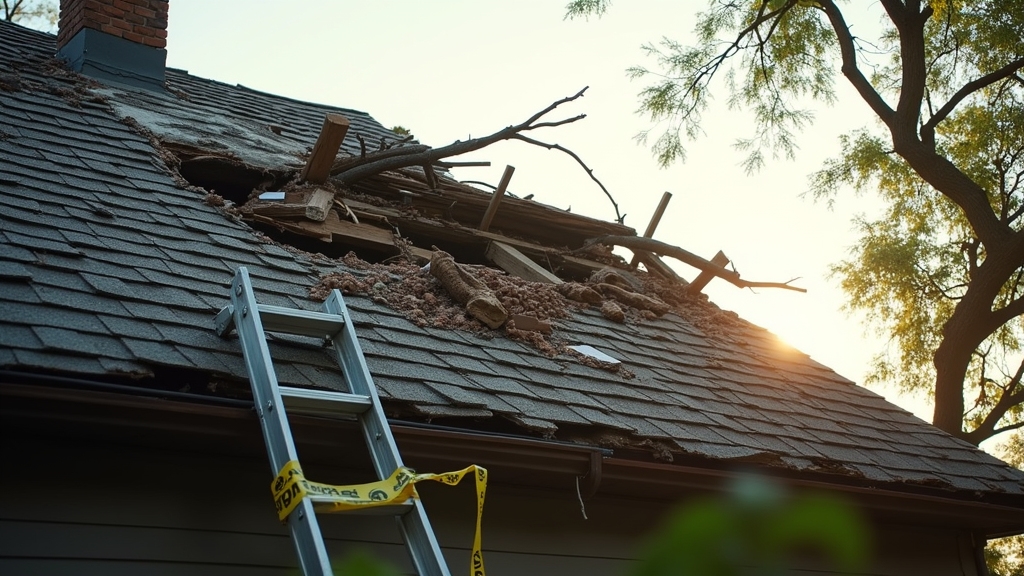
Assess Safety and Stay Off the Roof
Before you do anything, check for immediate hazards and stay off the roof unless it’s absolutely safe—missing shingles, sagging areas, loose debris, exposed wires, or standing water are all red flags.
You’ll want to walk the perimeter from the ground first, scanning for structural damage and signs someone else has moved debris. If you see any doubt about stability, don’t climb; call a pro.
When it’s safe and you must approach, use proper roof safety practices: wear non-slip boots, a helmet, and a harness anchored to a secure point.
Keep a charged phone and basic emergency equipment—flashlight, first-aid kit, and rope—within reach. Never work alone; have a spotter who can summon help.
Limit time on the roof, avoid wet or windy periods, and secure tools and materials to prevent slips.
Prioritize safety over quick fixes; temporary tarps and professional assessments are smarter than risky DIY repairs.
Locate and Contain Interior Leaks
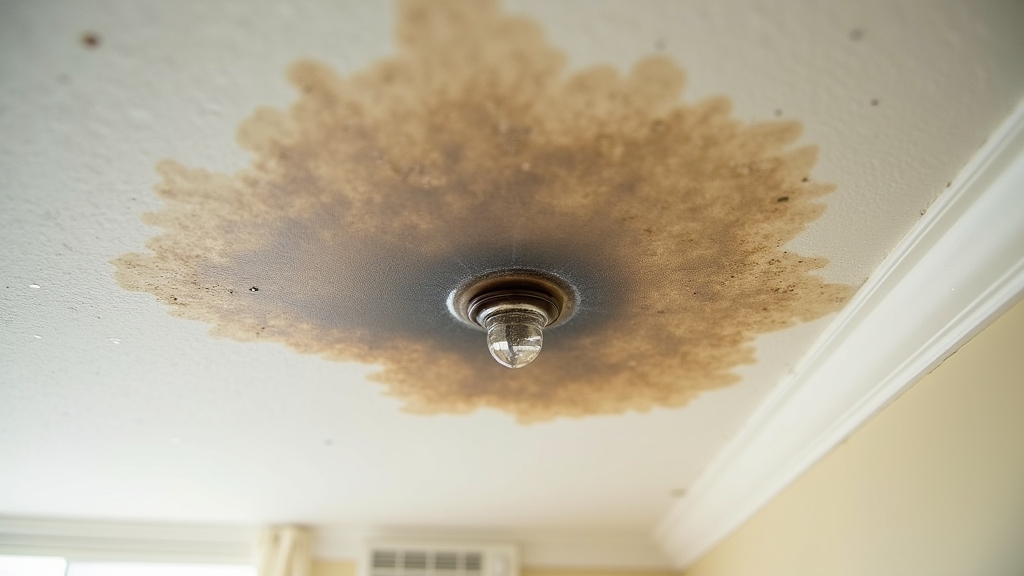
Start by tracing where the water is entering and follow stains or drips back toward the roofline to find the source.
Move furniture, electronics, and valuables out of the wet area or cover them with waterproof sheeting so they don’t get ruined.
Use buckets, towels, or a tarp to contain and direct water away until you can make a temporary repair.
Find Leak Source
Where’s the water actually coming from — and how fast is it spreading? Start by clearing the area and placing a bucket under drips. Use leak detection methods: follow stains on the ceiling, probe seams and penetrations, and note when leaks worsen.
Inside, mark wet spots and trace water trails downhill; water often travels far from the roof entry.
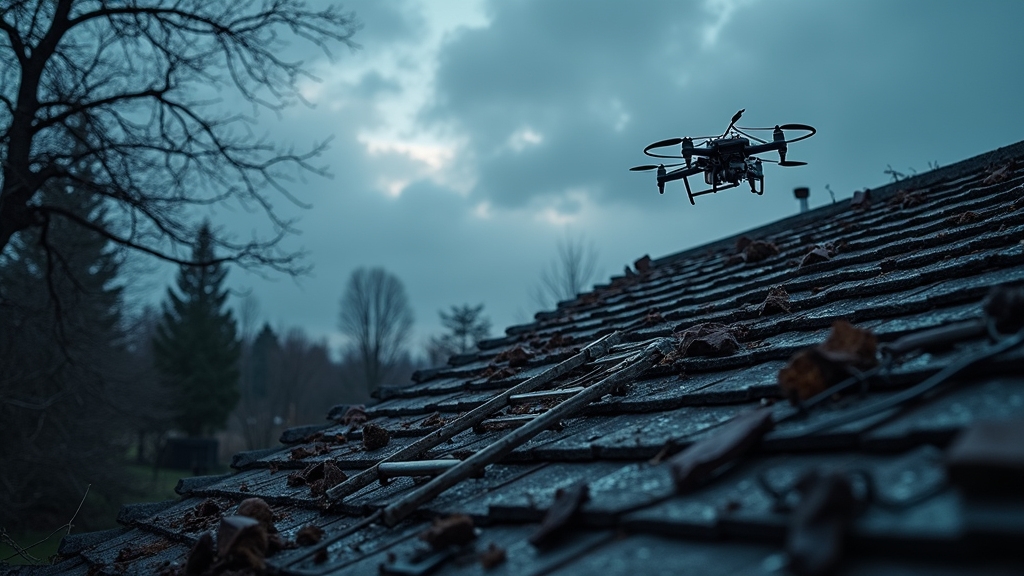
On the roof, do a careful roof inspection only if it’s safe or from a ladder with a partner. Look for missing shingles, torn flashing, clogged valleys, and around vents or chimneys. Photograph damage for records.
If you can, stop small drips with roofing tape or a tarp temporarily. Call a professional when the source isn’t obvious or conditions are unsafe.
Protect Valuables Immediately
If water’s getting in, move your valuables out of the drip zone right away and contain interior leaks to prevent further damage.
You’ll want to act fast: protect documents, electronics, and keepsakes, then note conditions for insurance coverage. Use temporary, dry valuables storage near an exterior door so you can grab items quickly.
- Gather priority items: passports, hard drives, small electronics — seal them in plastic bags and place in a sturdy box.
- Create a safe path: lift rugs, move furniture off wet spots, and prop wet cushions to air out where they won’t drip on other items.
- Document damage: take photos, list affected items, and keep receipts for temporary storage or emergency purchases to support insurance coverage.
Temporary Water Containment
Having secured your valuables, turn your attention to stopping the water itself: locate the leak source and contain interior drips to prevent further damage.
First, follow stains or sound to pinpoint the entry point; you may need a flashlight and gentle probing. Catch drips with buckets or pans placed directly under active leaks, and set towels or a tarp beneath to protect floors and furniture.
Create temporary barriers with plastic sheeting taped to walls or ceilings to channel water toward your containers. For larger flows, fashion a simple water diversion using a guttered board or angled tarp to direct runoff away from vulnerable areas.
Check containers often and empty them safely. If water reaches electrical fixtures or you can’t control the flow, turn power off and call a professional.
Protect Exposed Areas With Tarping
When you tarp a damaged roof, start by securing the edges with durable fasteners so wind won’t lift it.
Make sure vents and chimneys are sealed separately or fitted with flashing to keep water out.
Use a breathable, reinforced tarp to shed water while preventing trapped moisture.
Secure Edges With Fasteners
Start by fastening the tarp’s edges to solid roof framing so wind can’t slip underneath and lift it. You’ll choose fastener types and follow installation techniques that suit your roof material and the tarp’s size. Use proper spacing and avoid over-tightening.
- Use galvanized roofing nails or screws with washers — they grip and resist rust, giving secure anchor points.
- Place a continuous 2×4 batten over the tarp edge and screw through tarp, batten, and into framing to spread load and prevent tearing.
- Add adhesive roofing tape under exposed seams and fastener heads to limit water entry and strengthen the seal.
Work from a safe position, test tension, and recheck after the next wind or rain to maintain protection.
Protect Vents and Chimneys
Because vents and chimneys stick up through the roof, you’ll need to seal them carefully so water can’t run down into gaps and cause more damage. You’ll inspect flashing, replace or add chimney caps, and fit vent covers before applying temporary tarps. Work from a stable ladder, clear debris, and use sealant rated for roofing. Secure tarp edges to sound decking and strap around vents without blocking exhaust permanently. Check that chimney caps sit snugly and vent covers allow airflow while keeping water out. Recheck after heavy rain and schedule a professional repair soon.
| Item | Action |
| Chimney caps | Confirm snug fit |
| Vent covers | Install and seal |
Use Breathable, Reinforced Tarp
After sealing vents and chimneys, protect any exposed decking with a breathable, reinforced tarp that sheds water but lets trapped moisture escape.
You’ll want a tarp with breathable materials and reinforced durability so wind won’t rip it and moisture won’t cause rot. Secure it tightly, overlap seams, and avoid trapping pockets of water.
- Choose a tarp rated for UV and reinforced durability; check grommets and webbing.
- Fasten with wide straps or batten strips; staple or nail only into secure framing.
- Inspect daily for shifting, ponding, or tears; patch small breaches with compatible tape.
You’ll minimize interior damage and allow the roof deck to dry.
Replace temporary tarping promptly with permanent repairs to prevent long-term issues.
Remove Debris and Clear Gutters
Before you climb, clear loose debris from the roof and gutters so water can flow freely and you can see damaged areas more easily. Start with debris removal: use a broom or gloved hands to move branches, leaves, and shingles into a bucket. Work from the top down and keep a clear ladder base. For gutter maintenance, scoop out blockages and flush with a hose to confirm flow. Wear non-slip shoes, eye protection, and a harness if available. Don’t stand on wet or unstable surfaces.
| Task | Quick tip |
| Debris removal | Bag materials as you go |
| Gutter maintenance | Flush low end to check flow |
| Safety check | Inspect ladder placement |
After clearing, photograph problem spots so you can plan temporary fixes or share images with a pro. If debris or gutter damage is extensive, get professional help to avoid injury or missed structural issues.
Secure or Replace Missing Shingles
When you spot missing or loose shingles, act quickly to prevent leaks and further damage: secure any loose shingles with roofing nails or replace missing ones with matching shingles and roofing cement, working from the bottom edge upward so pieces overlap correctly.
When you notice loose or missing shingles, act fast—secure or replace them from the bottom up to prevent leaks.
You’ll want to identify shingle types before buying replacements and follow basic installation techniques to keep the roof watertight. Start safely: use a stable ladder and wear gloves.
- Remove damaged shingle remnants, clean the area, slide a matching shingle into place, nail at the factory-applied nail line, and seal edges with roofing cement.
- For loose shingles, lift the tabs, drive corrosion-resistant nails into the same nail line, and seal the lifted edges so wind won’t catch them.
- Match granule color and profile, stagger seams with adjacent rows, and follow manufacturer installation techniques to maintain warranty and performance.
If you’re unsure, document damage and consult a pro to avoid improper repairs that cause bigger problems.
Check and Reinforce Flashing and Vents
Because flashing and vents are common leak points, inspect them carefully for gaps, rust, or displaced seals and reinforce or replace failing pieces to keep water out.
When you do flashing maintenance, lift nearby shingles gently to check that metal or rubber flashing sits tight against the roof and chimney or wall. Look for cracked rubber boots around vents, corroded step flashing, or sealant that’s shrunk away.
Perform a vent inspection by confirming vents are securely fastened and free of debris that can trap moisture. If you find small gaps, apply a compatible roofing sealant or replace worn boots; for badly corroded flashing, swap in new pieces sized to match and fasten with corrosion-resistant screws and roofing cement at seams.
After repairs, run a hose briefly from the ground to test for visible leaks. If you’re unsure about structural connections or working on a steep roof, call a licensed roofer to avoid unsafe DIY fixes.
Document Damage and Contact Your Insurer
Start by capturing clear, time-stamped photos and videos of every damaged area — inside and out — before you move or cover anything. You’ll build strong damage documentation that supports insurance claims and speeds approvals. Note locations, measurements, and progressions (e.g., leaks after rain), and keep originals organized.
- Photograph every affected roof plane, soffit, gutter, attic, and interior water stain with a date/time stamp.
- Record short video walk-throughs describing what you see, noting when you first noticed the issue and any temporary repairs you made.
- Keep receipts, contractor estimates, and written notes in a single folder or digital file for easy retrieval.
Call your insurer promptly, provide the documentation, and ask about their preferred claim process. Don’t sign contractor waivers until you understand coverage.
If an adjuster visits, walk them through your photos and notes. Clear, concise damage documentation reduces disputes and gets repairs started faster.
Frequently Asked Questions
When Should I Call a Professional Instead of DIYING Repairs?
You should call a professional when DIY limitations risk safety, damage, or code violations; you can attempt minor fixes, but get a professional assessment for structural issues, extensive leaks, large debris, insurance claims, or uncertain damage extent.
Can Emergency Repairs Void My Home Insurance Coverage?
Yes — if you perform improper emergency repairs, your insurance policy might deny claims; you should document repairs thoroughly, keep repair documentation, take photos, get receipts, and notify your insurer promptly to avoid coverage disputes.
How Long Can Tarps Safely Remain on My Roof?
You can usually keep a tarp on for a few days to a few months, depending on tarp lifespan and roof materials; you’ll want professional repairs within 30–90 days to avoid leaks, wind damage, or warranty issues.
Will Temporary Repairs Affect Resale Value?
Yes — temporary repairs can lower resale value if buyers spot visible damage or suspect ongoing issues. You should document repairs, get professional fixes quickly, and disclose temporary repairs to avoid surprises and preserve buyer trust.
Are There Financial Aid Programs for Storm-Damaged Roofs?
Yes — you can qualify for storm assistance and roofing grants through FEMA, HUD, state programs, and nonprofits; check eligibility, apply quickly, keep documentation, and contact local emergency management or housing agencies for guidance and help maneuvering available funding options.
Final Thoughts
After a storm, your priority is simple: stay safe, act fast, and prevent further damage. That means assessing from the ground, containing interior leaks, using tarps to cover exposed areas, and clearing debris and gutters once it’s safe to do so. Temporary steps like these—paired with smart documentation and a call to your insurer—can make a big difference in how much damage you face and how smoothly your claim goes. If you’re already seeing active leaks or ceiling stains, it’s time to treat the situation as an emergency roof leak, not a “wait and see” issue.
You don’t have to handle that chaos alone. Bloomfield Construction and Restoration offers 24/7 emergency roofing help for urgent roof leaks, fast tarping, and quality roof repair services tailored for Bloomfield Hills residents. Our team can stabilize the damage, inspect your roof, and help you understand what to expect from emergency roof leak repair—including how it ties into insurance restoration and long-term repair or replacement options.
If a recent storm has you worried about your roof, contact Bloomfield Construction and Restoration today. We’ll respond quickly, assess the damage, recommend the right next steps, and help turn your emergency stopgaps into lasting, professional repairs that protect your home and your peace of mind.